Rail Recon
Project Stats:
| Name: | Rail Recon |
| Project type: | Student project |
| Production Time: | 8 weeks |
| Date: | 2017-2018 |
| Engine/language: | Unreal Engine/Blueprints |
| Platforms: | PC |
| Tools: | Perforce, Jira |
| Team members: | 4 programming students, 4 art students, and 4 design/production students |
Project Description
Rail Recon is a top-down twin-stick shooter created during the first year of my university study.
Assignment
The game concept was created in two weeks by 3 people. At weeks 3 week 5 and week 7 a group of 3 people(a programmer, an artist, and a designer) joined the project. I was part of the first group joining in week 3. We worked on the project for 8 weeks. After the school project was done we decided to continue working on the project in our free time to release the game on steam.
My contributions
For Rail Recon, I worked on the character movement I made the base class for the player. This class was used by another programmer as the base class for the enemies. I also created the level editor. Please click on any of the links below to delve deeper into my contribution.
Character movement
The character movement of this game was a unique challenge. I would describe it as a set of one-dimensional words connected in a 3-dimensional world. The Character essentially moves over a network of connected splines. Based on player input and movement speed the character switches spline or stops moving.
Because this was a unique movement system I decided to not use Unreal Engine’s physics system. Instead I created the movement system from scratch.
Level editor
The movement system in this game uses nodes. Two different nodes can connect to create a straight connection or a spline.
At the start of the project connecting the nodes was a very slow process and making a mistake was common. When the nodes were connected rails needed to be put on manually. I improved the level editor over time so designers could make levels faster and with fewer mistakes.
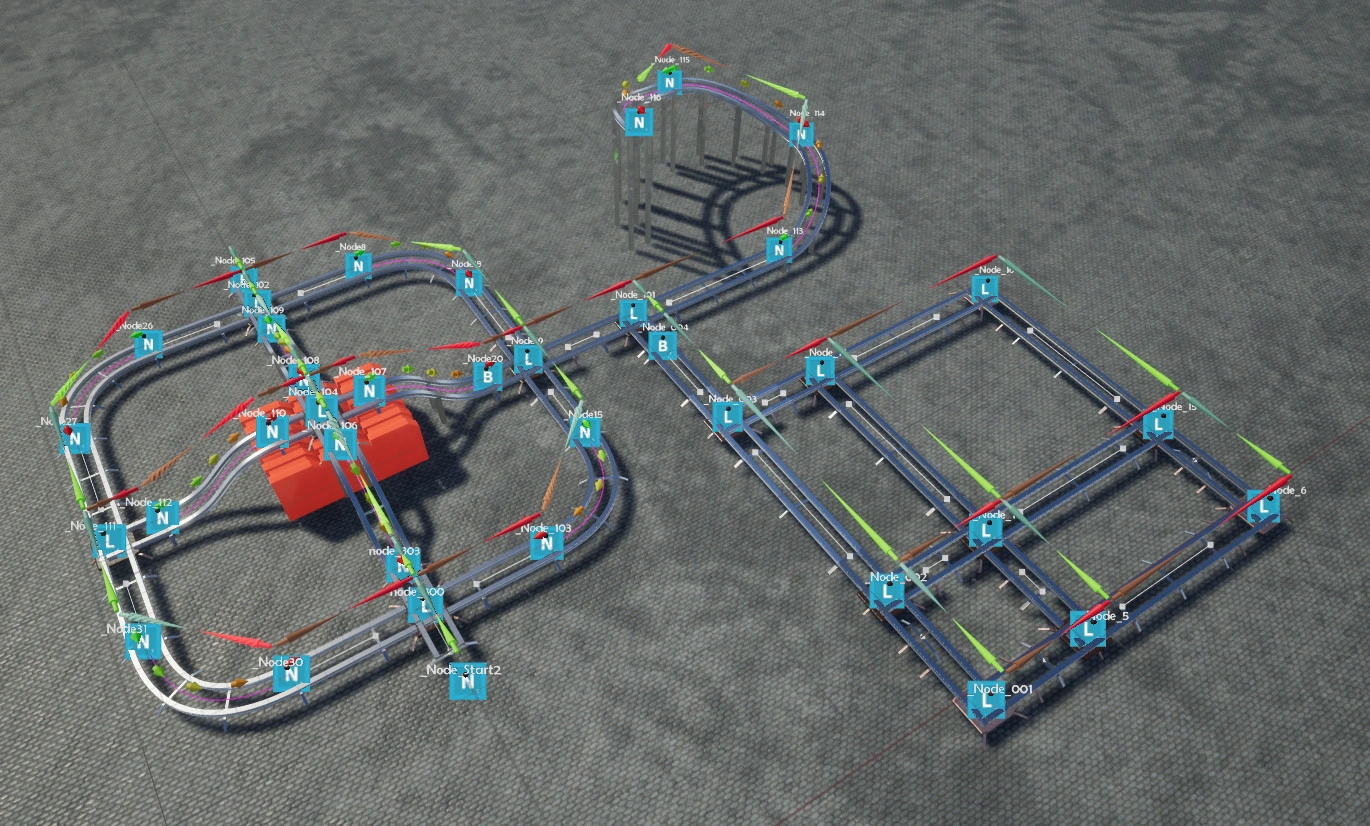
Connection Editor end product
Level editor > Visual feedback for node connections
While working on the game I simultaneously worked on making the editor more efficient. I had to think carefully about spending the right amount of time on the editor to make designing the level efficient enough while not hurting my work on the gameplay.
Iterations of the node connections Visual feedback:
Version 1
No way to see if connections are correct. All connections had to be checked manually by checking the detail panes of the Actors in unreal or manually by playing the levels.

Version 1
Version 2
Problem: Not able to see node connections. Solution: Arrows that point in the direction of the connected nodes.
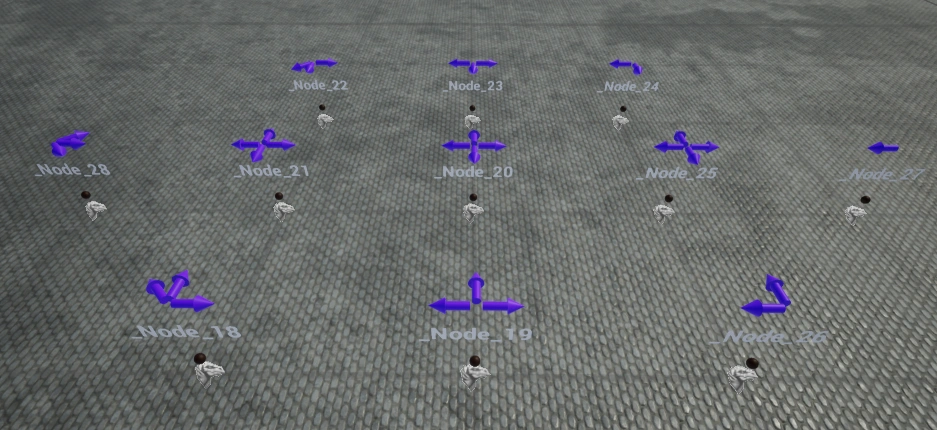
Version 2
Version 3
Problem: Not able to see if connected to the correct direction. Solution: Added colors to arrows for each direction.
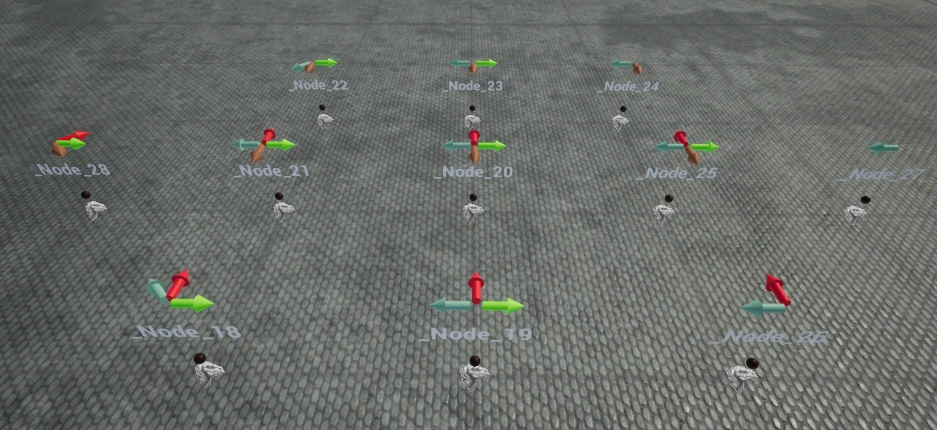
Version 3
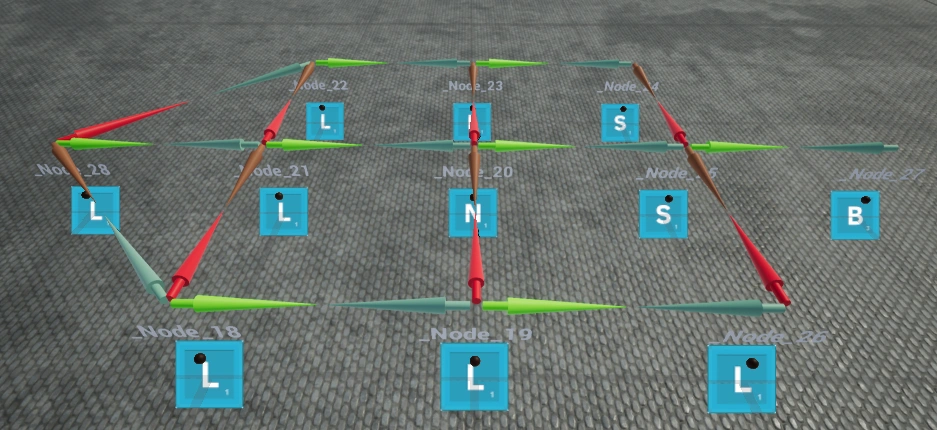
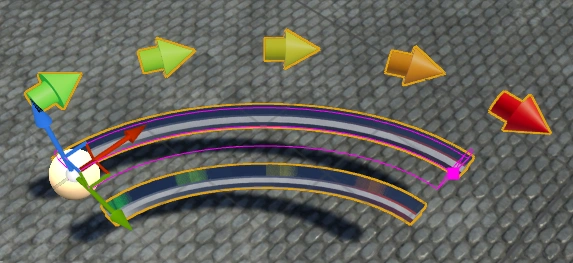
Version 4
Problem: Not able to see if connected to the correct node if there are more nodes in the same direction. Solution: Made the length of the arrows half the distance to the connected node.
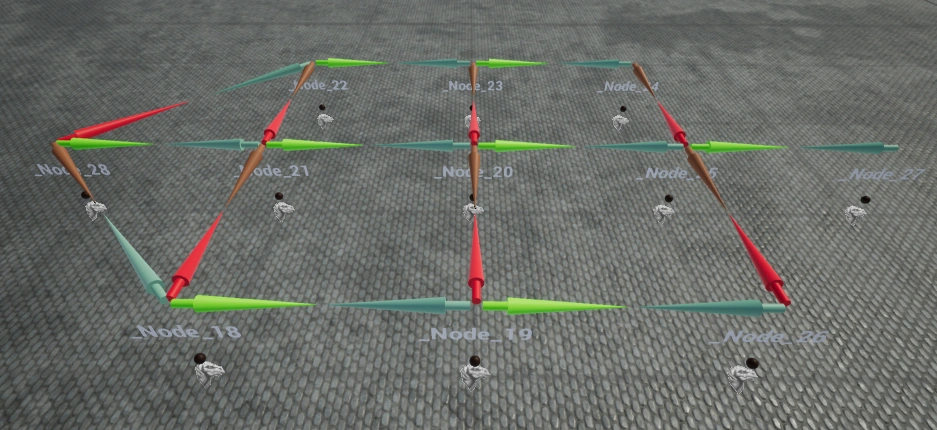
Version 4
Version 5
Problem: Cannot distinguish between node types. Solution: Different billboard sprite(texture) per node type.
Version 5
Version 6
Problem: Text has a fixed rotation. When using top view text is not visible. Solution: A text material that is always rotated to the camera.
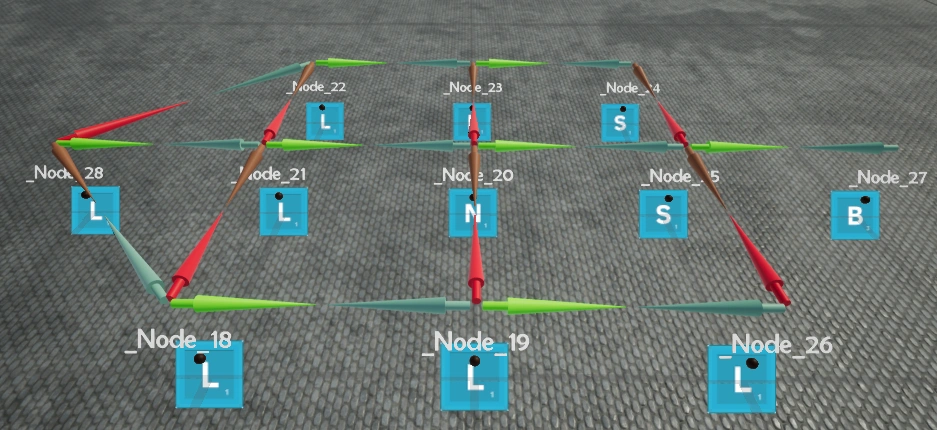
Version 6
Version 7
Problem: Normal connections arrows look the same as spline connection arrows. Solution: Changing material if there is a spline connection.
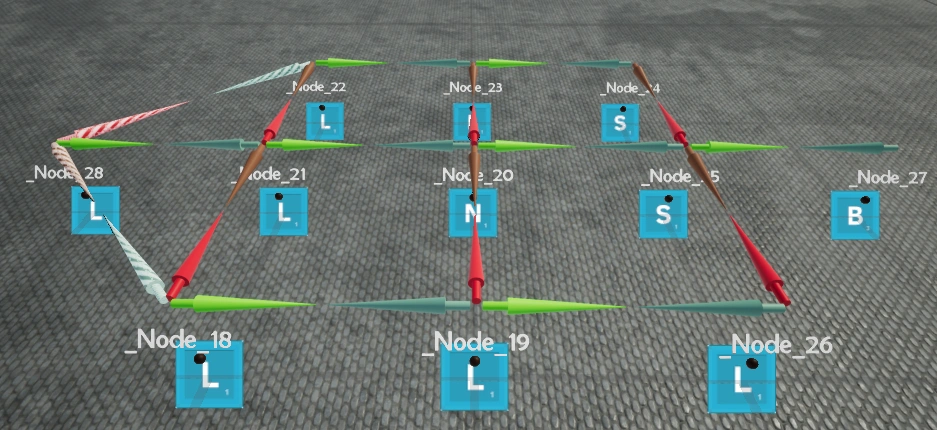
Version 7
Result
As a result of these improvements, we were able to see how the level was connected without looking at the details panel. Because of this, we were able to spot mistakes in the levels before testing them. This saved a lot of time and made creating a level easier and less time-consuming.
Level editor > Faster connections for the node editor
Setting up the node connection one by one did take a long time so I made this partially automated.
The image on the right shows a details panel of a node. As you can see this is a lot of data. It did take a lot of time to set up the correct connections in the right slots and it was prone to errors.
So I made a tool that allows you to select a node. and that node gets put into the correct connection automatically.
This only worked for non-spline connections but it did save a lot of time. In a quick test I did I was able to make 13 connections in 3 minutes and 30 seconds without the tool. It only took 1 minute and 40 seconds with the tool.
Automated node connections to the correct direction
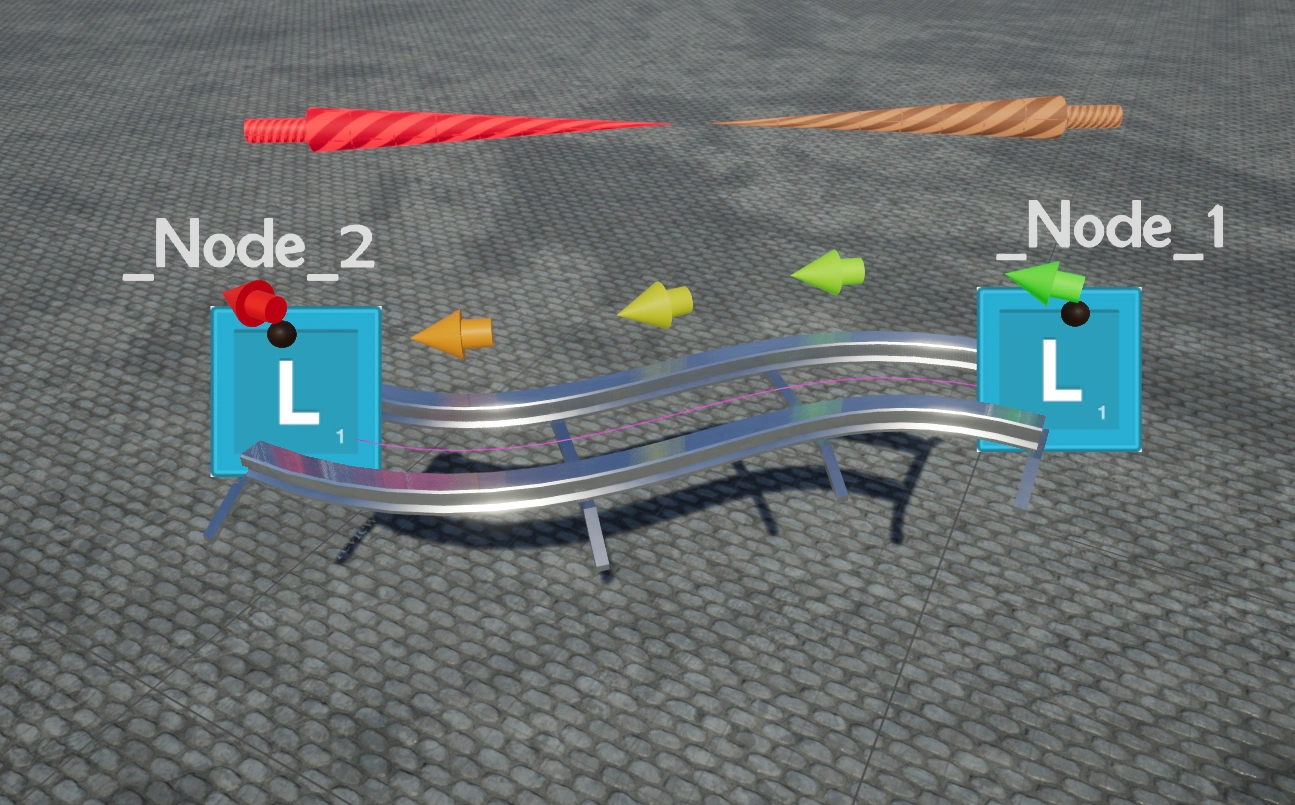
Level editor > Rail splines
Problem with setting up rail splines manually
The spline rail in-game is made up of two components: a visual component created using a spline mesh and a spline blueprint which the player uses to move along. Editing both components separately was a tedious and error-prone process. To solve this I created a constructions script in the spline blueprint that automatically added a spline mesh to it.
A spline connection blueprint
To make setting up a spline clearer I drew instructions on a piece of paper and sent that to the level designers. I got feedback that this was unclear as well so I created video instructions. Even with the videos the image and verbal instructions, It was still a hard to set up and a time-consuming process.
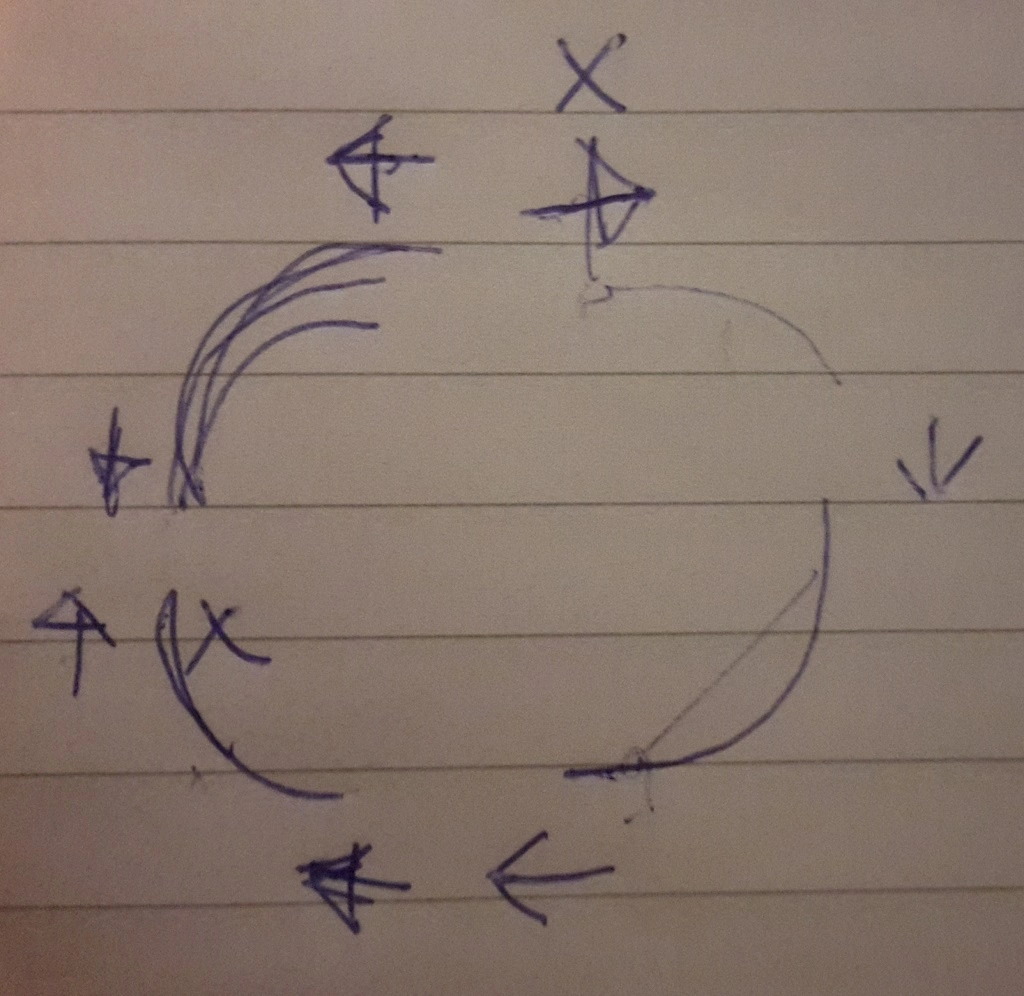
Instructions for creating spline connections for level designers
Level editor > Procedural rail generation
After the nodes were connected the game designers manually decorated the nodes with rails. This task took the game designers a lot of time and made testing way slower. To speed this process up I made a tool that procedurally puts all the rails in the right place based on the node editor.
Blueprint - Level editor construction script that generates the rails
Automating rail cross-sections t-sections and splines
Instead of all the manual work to set up splines, I created a blueprint that automatically creates all the splines. It uses a constructions script that goes through all the nodes and based on the node data it generates rail splines on the correct positions. When there are 4 node connections it generates a cross sections rail. When there are 3 node connections it generates a t-sections rail. When 2 node connections are not in opposite directions or are not on the same line it generates a spline rail.
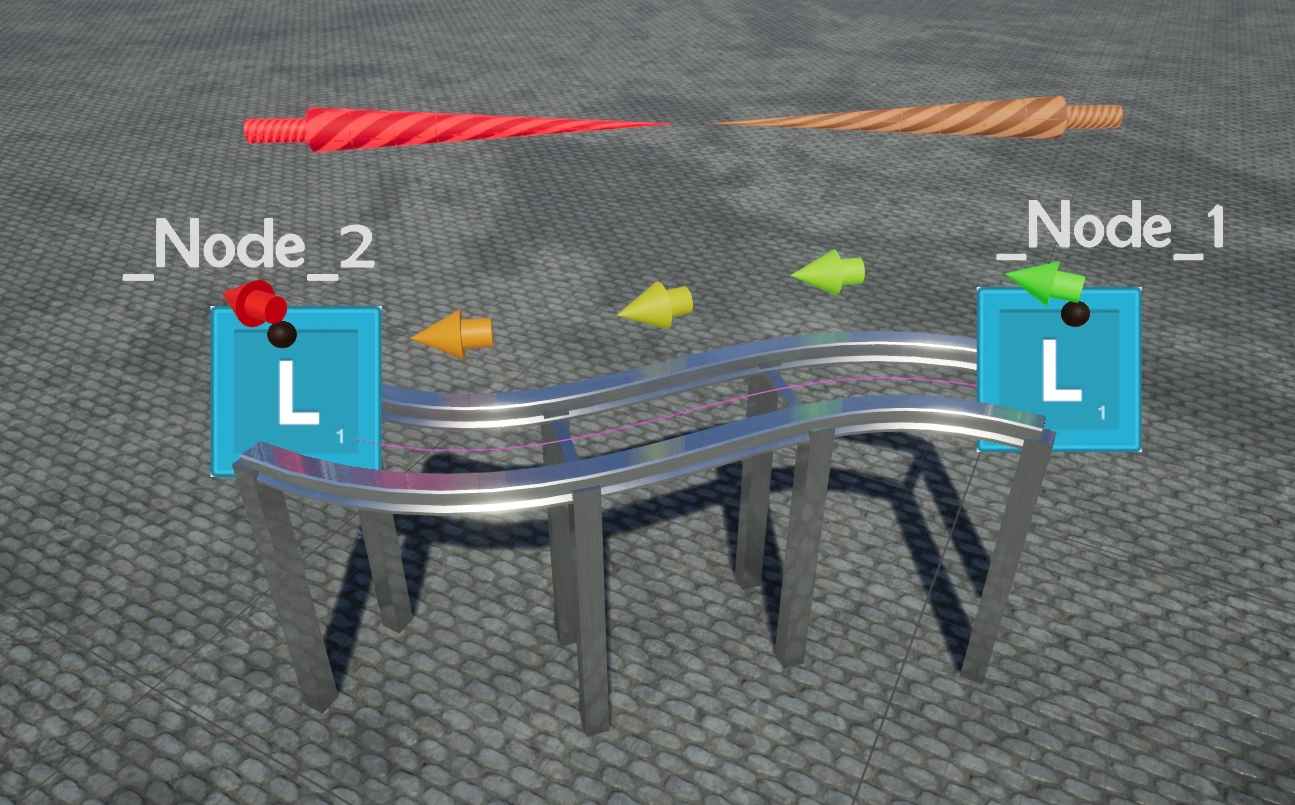
Decorations
To add decorations to a rail I created a function that can put objects at fixed distances on a spline. Combining those functions with different parameters can create different looks for rails.
Steam release
My team decided to continue working on the project in our free time so we could release the game on steam.